Entries (RSS)

Wednesday, October 20, 2010

FINAL EPISODE~

FINAL EPISODE ~~~

SAYING GOOD BYE TO OUR BELOVED BIOREACTOR AND MR. SHAMAN....


After have such a great time with our beloved bioreactor now is the time for us to say good bye..

The first thing that we had done was to clean the bioreactor and the disposal of the fermentation culture.

The disposal of fermentation culture through harvesting line


After that we need to take out one by one the compartments of the bioreactor and wash them, but take note that certain compartment can not be washed such as filter. 


The pH electrode was washed


The pO2 electrode was washed

The vessel fitting was started to open


The vessel fitting was washed


The baffles was washed


The vessel was washed


All parts of the bioreactor was already completed in the washing step

Tuesday, October 19, 2010

Result (part 3)

Graph of the Bioreactor


1. The relation between pressure of oxygen and stirrer  at 23:50 to 23:53 is that when the pressure of oxygen is going down, the stirrer is increase as well  as temperature.It means that the oxygen is being consumed by the yeast. As the dissolved oxygen level decrease, the stirrer will play its role that is to agitate faster so that the yeast will get adequate amount of oxygen. So, the yeast would not die.

2. at duration  23 : 26 :20 . As temperature increase , pressure of oxygen increase.


Result (part 2)

The Graph OD reading at the abs 600nm  versus time


This graph shows the curve of Saccharomyces Cerevisiae growth. Based on the graph , the lag phase starts from at 12.25  to 2.50 . But this phase does not last long because it is only for the adaptation of the  cells towards the  culture environment.At this time, the level of oxygen pressure is still high as well as temperature  and pH.

After  that ,  the growth increase from 2.5  to 6.5.The increment  at the log phase  (or also known as stationary phase) is due to cells’ growth rapidly and also the cells begin to uptake the glucose and minerals .The cell reproduction  has two types .Firstly , sexual  spore production and secondly , asexual budding .

After  the  log phase it supposes to be exponential phase . However ,  the  growth  goes  down  at 7.5 to 8.5 . However, there are two assumptions here:
1. It might because of the glucose level decreased too much  during the log phase due to the yeast consumption. 
2. Besides, this might also  because of the error during the sample is taken where the sample taken might have mixed with the previous sample and as a result, the glucose concentration changed during sampling.

At the peak of the graph,  the consumption of glucose is at maximum. Then the cells will stated to die off. When the concentration of glucose is going down therefore the  growth of cells decreased too due to more of cells death .

After  that, as more of the cells are death, the glucose level is increasing again and as the glucose increase, the cell’s growth is increasing too.

Then, after  the amount of cells are growing at the maximum rate, the amount of glucose becoming limited at 12.5 am.Therefore, more cells  tend to die and then, the toxin will start to produce from the cells. And this can cause the growth rate is going down abruptly.

DAY 4 - RESULT

Number
Time
OD 600 Glucose
Sample name
1
12.50
0.783
0.783
26.3 (2)
T0
2
2.50
0.220 (10 x)
2.200
17.2 (2)
T1
3
3.50
0.540 (10x)
5.400
21.0
T2
4
4.50
0.638 (10x)
6.830
2.3
T3
5
5.50
0.898 (12.5x)
11.225
Low
T4
6
6.50
0.873 (15x)
13.095
Low
T5
7
7.50
0.791 (17x)
13.447
Low
T6
8
8.50
0.508 (18x)
9.144
Low
T7
9
9.50
0.671 (20x)
13.42
Low
T8
10
10.50
0.577 (21x)
12.117
Low
T9
11
11.50
0.661 (20x)
13.22
Low
T10
12
12.50
0.737 (21x)
15.477
Low
T11
13
2.50
0.568 (25x)
14.2
Low
T12
14
4.50
0.359 (30x)
10.77
Low
T13
15
6.50
0.229 (30x)
6.87
Low
T14
16
7.50
0.234 (20x)
4.68
Low
T15
17
8.50
0.102 (20x)
2.04
Low
T16
18
9.50
0.038 (20x)
0.76
Low
T17
19
10.50
0.041 (20x)
0.82
Low
T18
Table 1
The table above is the data of the OD at the abs 600nm and also the glucose contain in the sample in certain hour.


Samples with at various hours


One of the samples taking the absorbance reading at abs 600nm using Spectrophotomete


Both pictures above are the picture of the sample of fermentation at the final period of fermentation. The pictures shows that the S. cerevisiae under the microscope and it proved that there are no contamination during the fermentation because there no other shape appear accept the shape of S. cerevisiae.

Sunday, October 17, 2010

DAY 3 - SAMPLING TIME

EPISODE 3, WE SPENT TIME TOGETHER FOR 12 HOURS


6/10/2010 


Wednesday  


10 A.M

10.30am – Mr Shaman shows us how to inoculate inoculums and sampling procedure.  The sample is taken for every 2 hours and started at time t=0. Then, the OD (optical density) is measured by using the spectrophotometer at 600nm. The glucose level is also being measured from every sample taken by using the glucose detector.


Before inoculation
  1. Setup the agitator speed at 700 rpm

  1. To remove oxygen level in medium. We inject the nitrogen gas in bioreactor. After we inject the nitrogen gas, we calibrate the fermentor at 0 %.0 % indicate that no oxygen in the medium. After that we add the oxygen until 100 %. We do the second calibration at this point.100% indicate 100% dissolved oxygen in the medium


Procedure during inoculation
1-      Wear the gloves and sterilize your hand with 70% of ethanol solution.


2-      Spray at the inoculation inlet tube and also at the end of the inoculation flask . Open the clamp of the inoculation flask. Take off the silicone tube at the inoculation inlet and immediately transfer the inoculums into the bioreactor. This is done to avoid any contaminations.

3-      The inoculation performed by gravity feeding ( holding the inoculums vessel higher than the fermentor)


4-      The inoculation inlet must be closed quickly after the inoculums transfer process.
Then our bioreactor is ready to use!!!!!
Sampling procedure
This procedure is important as it is used to know whether the yeast containing inside the media is still alive or dead. But, be careful during this procedure as it can lead to contamination if doing it wrongly. So, here’s the procedure.
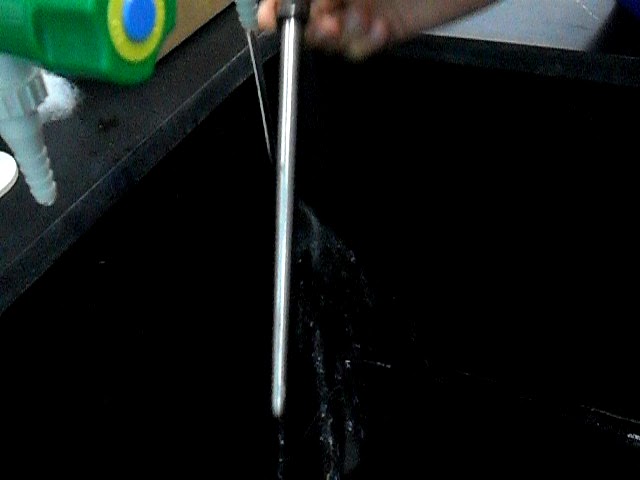
1-      A syringe is used to suck out the sample from the bioreactor and it should be connected to a filter so that the inlet air would be filtered.  A Y connector is used to connect the sample bottle to the bioreactor and the sample tube to suck the sample out.


2-      The clamp connecting to the bioreactor must be opened first. Then, the sample is suck out by using the syringe. Sample is collected in the sampling bottle. The clamp is closed again.


3-      After that, the clamp connecting to the end of the tube is opened to take out the sample for OD measurement. By using the syringe again, the sample in the sampling bottle should be suck out ALL OF THEM!! (this is because to avoid the inaccuracy during the OD measurement)


4-      Then, after taking the sample. Spray the alcohol at the end of silicone tube immediately


5-      Wrapped the silicone tube with cotton and aluminium foil to prevent contamination


6-      All the activities were recorded by Iris Software. From our experiment, Iris will give us information on the operation of our bioreactor. The parameters we selected were dissolved oxygen, agitator speed, anti foam, base, temperature and pH.


Wednesday, October 6, 2010

DAY 2 - PREPARATION OF OUR BIOREACTOR


EPISODE 2,  GET TO KNOW YOUR BIOREACTOR  DEEPLY!!

Date:    5.10.2010 (Tuesday)

Time:    8.00A.M

Place:   Room 148 PPTI 


After reaching the lab, we prepared seed culture, we using sterile toothpicks to scrape up a single colony aseptically. The work will be completed by transferring the colony into the shake flask which contained medium. We left it overnight (18-24 hours) in the incubator shaker.

  Colonies of S.cerevisiae


Today is to set up the bioreactor. Mr. Shaman showing to us step by step how functioning a bioreactor. First, he prepared the buffer pH 4.01 and buffer pH 7.01. Then he took the pH probe and removed the cap on the bottom and scraped platinum to make sure it is neutral. He put the probe in the pH buffer to set the point of the calibration curve, C1 is pH 7.01 and C2 is pH 4.01. When we calibrated, need to insert the pH probe together with the temperature probe to allow comparison.


Both pictures show the way to calibrate the pH probe

Then, he poured the medium into the vessel with the adding of 15ml distilled water to make sure that no evaporation lost during autoclaving the medium.

The medium was poured into the vessel
  

He took the pO2 electrode and removed the green plastic end cap. Then, the bottom metal section was unscrewed to check whether there was liquid electrolyte in the membrane cartridge inside. There is a bottle provided from the company to top up the liquid electrolyte if the level of the liquid is low. After that, he replaced the end section, and fit it into the vessel vertically and secured it.

Then he prepared the reagent which is antifoam liquid by adding around 10ml in the 250ml bottle. Make sure a silicone dip tube is connected to one metal pipe on the head plate. The tubing between the bottle and the pump head is clamped off.

Then he set up other parts of the fermentor, exit gas cooler with filter, inlet filter connected to sparger, free port for inoculation and sample device. Need to double check all these accessories already completely set up. Then need to use aluminium foil to close all the parts that will direct exposed to the air before autoclaved, so that the fermentor will remain sterile after taking out from the autoclave.


Bioreactor is ready for the autoclaving

Bioreactor in the autoclave

Bioreactor after the autoclaving


After the bioreactor was autoclaved, it needs to be polarized with oxygen for about 2 hours... so for this day is end at this state and will proceed tomorrow with innoculation and sampling procedure.

DAY 1 - First Day We Met Room 148 Bioreactor


EPISODE 1- THE DAY WE MET EACH OTHER

Date:    4.10.2010 (Monday)

Time:    1P.M

Place:   Room 148 PPTI

This was the first that we started our laboratory experiment of IBG 302 (Bioreactor Operation). The planned for this day that to introduce us to the bioreactor scale of 2L and the brand is Infors HT. The ratio height to diameter of this bioreactor is approximately 2.5 : 1. It is very advisable that the ratio of height is at least twice bigger to the diameter of bioreactor.
Before Mr. Shaman started his presentation on the bioreactor, he had told us about fermentation that mostly we had learnt in class.

This is Mr. Shaman from INFORS HT company

The detail informations about that bioreactor have been explained more detail. As for the first day he had show us how to unpack the bioreactor start from its box. After that, he showed how to set up that bioreactor. Personally, at first we thought that its hard to set up the bioreactor but....

Bioreactor after take out from the box


Bioreactor before finish the set up

Now we would like to introduce the compartments of the bioreactor, that Mr. Shaman already told us, and also some pictures of them.

Mr. Shaman introduce us the compartments of the bioreactor. This is the vessel and its holder

The function of the vessel is where the fermentation take place,  and the headspace for the vessel to operate at optimum condition is usually 20-30% of total volume. The function of the holder is to hold the vessel. 
Sample Device


Support Frame


Harvest Line
The function of the harvest line is to harvest the desired product and also for the disposal purpose.


Rotameter

The rotameter is the means of manually controlling the amount of air entering the vessel and for controlling the gas flow rate.

Reagent Bottles Holder


The function of this holder is where the reagent bottles are usually placed during the fermentation.


Reagent Bottles


The reagent bottles that usually needed during the fermentation take place are, reagent bottle for base, antifoam and acid, but in this experiment we do not need acid because we dealing with microorganism, which is yeast (Saccharomyces Cerevisiae) which usually will produce acid trough out the process


pO2 Probe

The pO2 electrode should already be connected to the bioreactor base unit which has been powered for at least 2 hours to ensure the electrode is polarized.

Peristaltic Pumps

These pump heads are removable and autoclavable. Silicone tubing connects the inlet side of the pump head (left) to the reagent bottle and the outlet (right) to the 2-way inlet fitting on the vessel top plate. Pumps for acid and base are supplied as standard along and antifoam plus the feed or harvest are optional.

Operational Amplifiers


Operating Panel


Exit and Inlet Gas 


Air Compressor


The function is to provide air during fermentation process.


Gun Fire Pistol

Utility Connection

Securing Plate


Securing Lock

pH Probe


Vessel Fittings and Accessories
Each Minifors which is supplied as a complete system will have a number of fittings, consumable item and useful accessories included.

at the fittings should include
An exit gas cooler
A sample device and pipe
A 3-way inlet
An innoculation port
A pH electrode ( p02 electrode and antifoam are options)

Consumables should include

Pressure tubing for water and air connections at rear and exit gas cooler
Air inlet and outlet filters, single use, inlet side is marked
Filters for reagent bottles and sample device

Here are some pictures of the Vessel fittings and accessories ~

Vessel Fittigs

The view of Vessel Fittings,
as we can see the accessories 

EPISODE 1 PART 2

MEDIA PREPARATION FOR INNOCULATION OF SACCHAROMYCES CEREVISAE 

After Mr. Shaman gave us some explanations about the components of the bioreactor and their functions, we had move to second part of our lab which was the preparation of media for the innoculation of Saccharomyces Cerevisiae, which is the yeast that we will use in this experiment. The media that we used in this experiment was YEPG medium which contain yeast extract (1%), Peptone (2%) and glucose (2%). The total medium that needed for the innoculation was 200ml, so the weight for yeast extract, peptone and glucose needed were :

Yeast Extract (1%) = 2g
Peptone (2%)          = 4g
Glucose (2%)           = 4g

and after that we dissolved them with distilled water.

Peptone


Glucose

Yeast Extract


After the medium was done, the media was then autoclaved before the innoculation of the yeast step was taken. Then, our lab for the first day is done.....